How To Install Owncloud 9 Server with NGINX and PostgreSQL on Ubuntu
In this tutorial , I am going to show you how to install and setup owncloud with NGINX with PostgreSQL and PHP 7 . Yes right php 7 , for performance benefits . So with without wasting time let’s get started .
NGINX
Okay lets install latest Nginx and configure it for owncloud server.
wget -O - http://nginx.org/keys/nginx_signing.key | sudo apt-key add -Now edit /etc/apt/sources.list File and add following lines , choose your ubuntu codename accordingly ( type lsb_release -c to see the codename )
deb http://nginx.org/packages/ubuntu/  wily nginx
deb-src http://nginx.org/packages/ubuntu/ wily nginx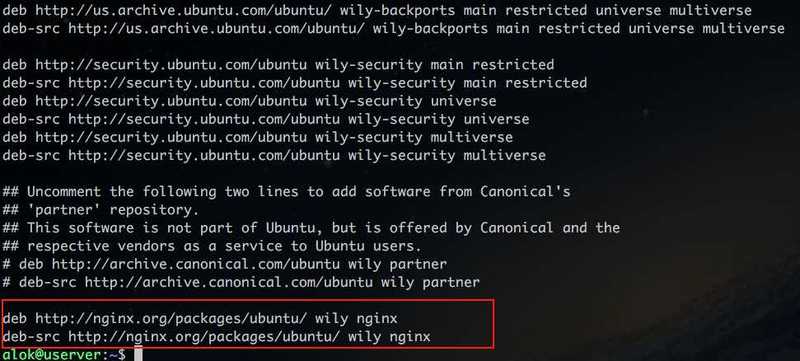
After that apt-get update and install nginx
sudo apt-get update
sudo apt-get install nginx
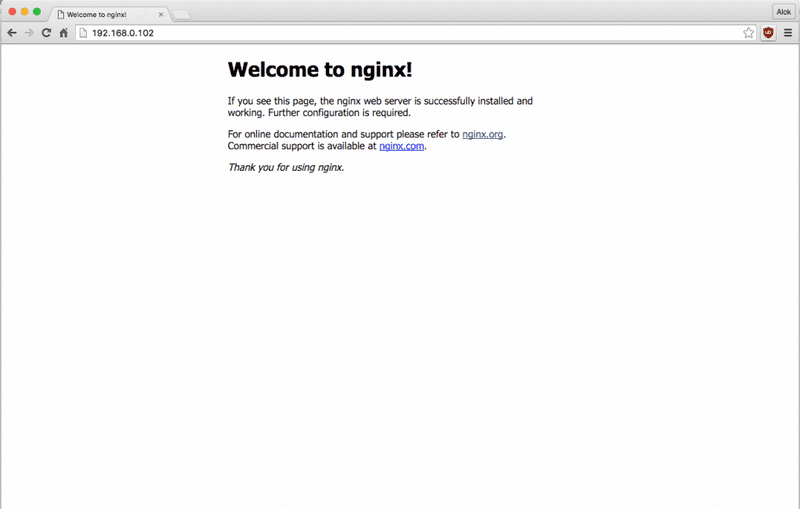
open browser and visit to your server IP address http://YOURSERVERIP , you will see default nginx page .
PostgreSQL
Add PostgreSQL PPA as directed here : http://www.postgresql.org/download/linux/ubuntu/
sudo apt-get install postgresql libpq5 libpq-devPHP 7
Lets install PHP 7 and other required libraries
sudo apt-get install software-properties-common
sudo LC_ALL=C.UTF-8 add-apt-repository ppa:ondrej/php
sudo apt-get update
sudo apt-get install php7.0 php7.0-fpm
Addition Libraries
sudo apt-get install php7.0-json \
php7.0-curl  php7.0-imap php7.0-mcrypt   \
php7.0-mcrypt php7.0-xmlrpc php7.0-zip   \
php7.0-zip  php7.0-pgsql  php7.0-opcache \
php7.0-cli php7.0-gmp  php7.0-fpm  php7.0-gd \
php7.0-xml  php7.0-ldap php7.0-intl
Installation & Configuration
Let’s add owncloud repositories , and then we’ll install owncloud files
## For Ubuntu 14.04 LTS

wget -qO - https://download.owncloud.org/download/repositories/stable/xUbuntu_14.04/Release.key | sudo apt-key add -
echo 'deb http://download.owncloud.org/download/repositories/stable/xUbuntu_14.04/ /' | sudo tee /etc/apt/sources.list.d/owncloud.list

## For Ubuntu 15.10

wget -qO - https://download.owncloud.org/download/repositories/stable/xUbuntu_15.10/Release.key | sudo apt-key add -
echo 'deb http://download.owncloud.org/download/repositories/stable/xUbuntu_15.10/ /' | sudo tee /etc/apt/sources.list.d/owncloud.list
lets install owncloud-files
sudo apt-get update
sudo apt-get install owncloud-files
Configuration
First of all lets configure role for owncloud , see detailed tutorial : https://www.computersnyou.com/4281
sudo su postgres

# Then lets setup `role` and create database for owncloud
postgres@userver:/home/alok$ psql

postgres=# CREATE ROLE owncloud ;
postgres=# ALTER ROLE owncloud WITH PASSWORD 'myPassword' ;
postgres=# ALTER ROLE owncloud WITH LOGIN ;

postgres=# CREATE DATABASE owncloud ;
postgres=# ALTER DATABASE owncloud OWNER TO owncloud ;

postgres=# \list
postgres=# \q
Now lets setup nginx as webserver for owncloud server . , owncloud recommended config can be found HERE
SSL is recommended (whether create self signed or get one free from https://letsencrypt.org/)
NGINX config , ADJUST this configuration accordingly , don’t just copy paste and try to run
upstream php-handler {
  server unix:/run/php/php7.0-fpm.sock;
}

server {
  listen 80;
  server_name cloud.example.com;
  # enforce https
  return 301 https://$server_name$request_uri;
}

server {
  listen 443 ssl;
  server_name cloud.example.com;

  ssl_certificate /etc/ssl/nginx/cloud.example.com.crt;
  ssl_certificate_key /etc/ssl/nginx/cloud.example.com.key;

  # Add headers to serve security related headers
  add_header Strict-Transport-Security "max-age=15768000; includeSubDomains; preload;";
  add_header X-Content-Type-Options nosniff;
  add_header X-Frame-Options "SAMEORIGIN";
  add_header X-XSS-Protection "1; mode=block";
  add_header X-Robots-Tag none;
  add_header X-Download-Options noopen;
  add_header X-Permitted-Cross-Domain-Policies none;

  # Path to the root of your installation
  root /var/www/owncloud/;
  # set max upload size
  client_max_body_size 10G;
  fastcgi_buffers 64 4K;

  # Disable gzip to avoid the removal of the ETag header
  gzip off;

  # Uncomment if your server is build with the ngx_pagespeed module
  # This module is currently not supported.
  #pagespeed off;

  index index.php;
  error_page 403 /core/templates/403.php;
  error_page 404 /core/templates/404.php;

  rewrite ^/.well-known/carddav /remote.php/dav/ permanent;
  rewrite ^/.well-known/caldav /remote.php/dav/ permanent;

  # The following 2 rules are only needed for the user_webfinger app.
  # Uncomment it if you're planning to use this app.
  #rewrite ^/.well-known/host-meta /public.php?service=host-meta last;
  #rewrite ^/.well-known/host-meta.json /public.php?service=host-meta-json last;

  location = /robots.txt {
    allow all;
    log_not_found off;
    access_log off;
  }

  location ~ ^/(build|tests|config|lib|3rdparty|templates|data)/ {
    deny all;
  }

  location ~ ^/(?:\.|autotest|occ|issue|indie|db_|console) {
    deny all;
  }

  location / {

    rewrite ^/remote/(.*) /remote.php last;

    rewrite ^(/core/doc/[^\/]+/)$ $1/index.html;

    try_files $uri $uri/ =404;
  }

  location ~ \.php(?:$|/) {
    fastcgi_split_path_info ^(.+\.php)(/.+)$;
    include fastcgi_params;
    fastcgi_param SCRIPT_FILENAME $document_root$fastcgi_script_name;
    fastcgi_param PATH_INFO $fastcgi_path_info;
    fastcgi_param HTTPS on;
    fastcgi_param modHeadersAvailable true; #Avoid sending the security headers twice
    fastcgi_pass php-handler;
    fastcgi_intercept_errors on;
  }

  # Adding the cache control header for js and css files
  # Make sure it is BELOW the location ~ \.php(?:$|/) { block
  location ~* \.(?:css|js)$ {
    add_header Cache-Control "public, max-age=7200";
    # Add headers to serve security related headers
    add_header Strict-Transport-Security "max-age=15768000; includeSubDomains; preload;";
    add_header X-Content-Type-Options nosniff;
    add_header X-Frame-Options "SAMEORIGIN";
    add_header X-XSS-Protection "1; mode=block";
    add_header X-Robots-Tag none;
    add_header X-Download-Options noopen;
    add_header X-Permitted-Cross-Domain-Policies none;
    # Optional: Don't log access to assets
    access_log off;
  }

  # Optional: Don't log access to other assets
  location ~* \.(?:jpg|jpeg|gif|bmp|ico|png|swf)$ {
    access_log off;
  }
}
Without ssl everything will be sent as plain text , and anyone in your network can easily sniff that , still If you dont want to setup SSL then just
- Remove the server block containing the redirect
- Change listen 443 ssl to listen 80;
- Remove ssl_certificate and ssl_certificate_key.
- Remove fastcgi_params HTTPS on;
Check Setup
okay lets verify all the setup
create owncloud data dir , we are going to store data somewhere else
sudo mkdir -p /var/owncloud/data
sudo chown -R www-data /var/owncloud/data
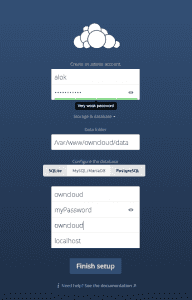
Now browse to your server ip address , you will default owncloud installation page , enter database info and OWNCLOUD DATA DIR and admin user info accordingly .
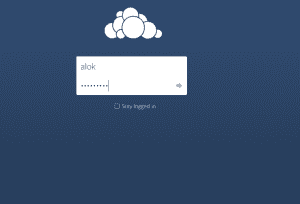
setup is almost complete . login with your admin username password . enjoy owncloud
<div class="col-sm-6 col-lg-6">
  <a class="thumbnail img-thumbnail" href='/wp-content/uploads/2016/03/Screen-Shot-2016-03-27-at-9.07.38-PM.png'><img width="300" height="201" src="/wp-content/uploads/2016/03/Screen-Shot-2016-03-27-at-9.07.38-PM-300x201.png" class="attachment-medium size-medium" alt="owncloud dashboard with files" srcset="/wp-content/uploads/2016/03/Screen-Shot-2016-03-27-at-9.07.38-PM-300x201.png 300w, /wp-content/uploads/2016/03/Screen-Shot-2016-03-27-at-9.07.38-PM-768x514.png 768w, /wp-content/uploads/2016/03/Screen-Shot-2016-03-27-at-9.07.38-PM-1024x685.png 1024w, /wp-content/uploads/2016/03/Screen-Shot-2016-03-27-at-9.07.38-PM.png 1453w" sizes="(max-width: 300px) 100vw, 300px" /></a>
</div><div class="col-sm-6 col-lg-6">
<a class="thumbnail img-thumbnail" href='/wp-content/uploads/2016/03/Screen-Shot-2016-03-27-at-9.07.59-PM.png'><img width="300" height="187" src="/wp-content/uploads/2016/03/Screen-Shot-2016-03-27-at-9.07.59-PM-300x187.png" class="attachment-medium size-medium" alt="owncloud photo viewer" srcset="/wp-content/uploads/2016/03/Screen-Shot-2016-03-27-at-9.07.59-PM-300x187.png 300w, /wp-content/uploads/2016/03/Screen-Shot-2016-03-27-at-9.07.59-PM-768x478.png 768w, /wp-content/uploads/2016/03/Screen-Shot-2016-03-27-at-9.07.59-PM-1024x637.png 1024w, /wp-content/uploads/2016/03/Screen-Shot-2016-03-27-at-9.07.59-PM.png 1449w" sizes="(max-width: 300px) 100vw, 300px" /></a>
</div>- self signed ssl tutorial
- official nginx config
- NGINX SSL Documentation [polldaddy poll=9350034]
