How to scan whole network quickly
In this tutorial, I will show you how to quickly scan your entire network using “masscan.” Masscan is a small, lightweight TCP port scanner written by Robert David Graham.
Masscan sends SYN packets asynchronously at a rate of up to millions of packets per second. To achieve speeds beyond 2 million packets per second, you need an Intel 10-gbps Ethernet adapter and a special driver known as “PF_RING DNA.”
“This is the fastest Internet port scanner. It can scan the entire Internet in under 6 minutes, transmitting 10 million packets per second.”
Build and install
To build and install masscan, follow these steps:
-
Install the necessary dependencies:
sudo apt-get install git gcc make libpcap-dev -
Clone the masscan repository:
git clone https://github.com/robertdavidgraham/masscan -
Navigate to the masscan directory:
cd masscan -
Build the binaries:
make
The binaries will be generated and placed in the masscan/bin sub-directory.
Masscan uses similar arguments as nmap, so if you are familiar with NMAP, it’s no big deal. The major difference is that you have to specify the port to scan because there is no default port set for scanning.
Example
For example, let’s assume you want to scan all addresses in the 192.168.100.1/24 range. Use the following command:
masscan -p80,443,445,443 192.168.100.1/24 --rate 100000000You can adjust the rate according to your network card speed. If you have a gigabit per second network card, it’s fine to use more than 100,000 packets per second.
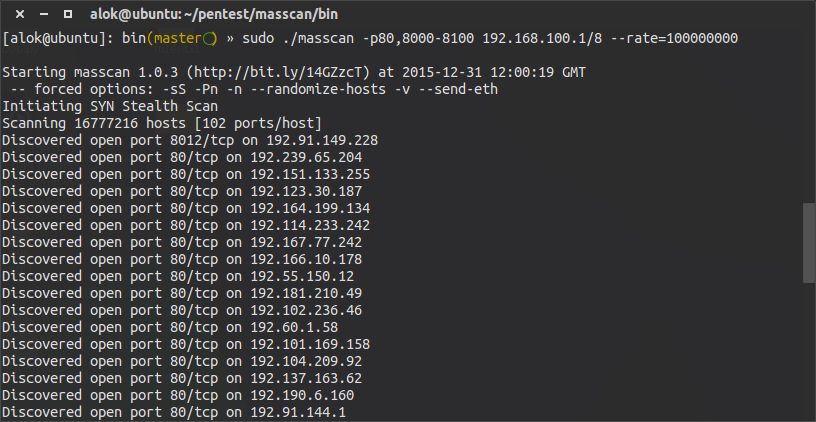
Here’s a sample output of the masscan result:

You can even attempt to scan the entire internet with masscan:
masscan 0.0.0.0/0 -p0-65535You can learn more about this feature on the masscan GitHub page: https://github.com/robertdavidgraham/masscan
Masscan allows you to print the output in various formats, such as list or XML formats. Refer to the GitHub page for more information: https://github.com/robertdavidgraham/masscan
I hope this tutorial helps you understand how to use masscan for network scanning effectively.